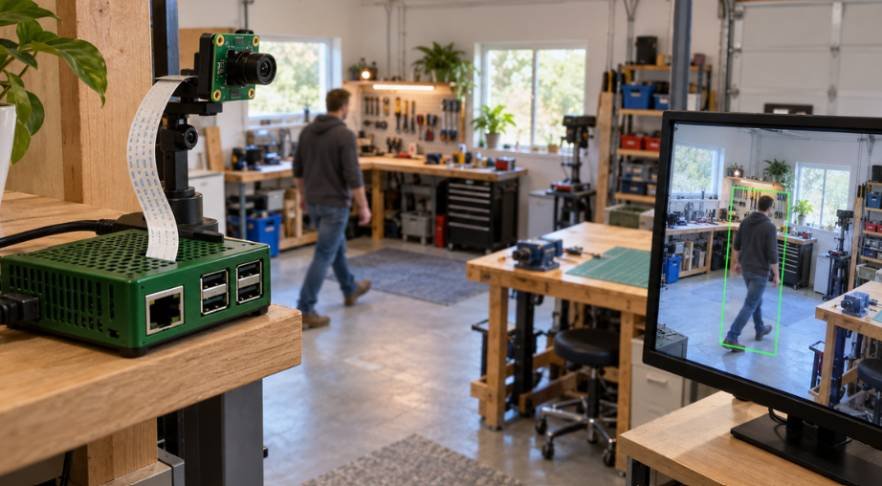
Subscription-based consumer security cameras turn personal privacy into an expensive monthly line item. When I wanted continuous coverage of my workshop entryway without third-party cloud streaming, I designed a raspberry pi home security camera with opencv that executes every detection algorithm strictly on-device.
Most existing tutorials remain stuck in older Debian Buster configurations that rely on legacy Video4Linux2 (cv2.VideoCapture(0)) drivers. On current Raspberry Pi OS Bookworm distributions, that approach produces broken pipelines and black frames with official Camera Serial Interface (CSI) modules.
By pairing Raspberry Pi’s modern picamera2 framework with OpenCV’s running background accumulators, you get an ultra-responsive, continuous security node that operates entirely within your local network.
+——————————-+
| Raspberry Pi Camera Module 3 |
| (Autofocus / Sony IMX708) |
+—————+—————+
| CSI Ribbon Interface
v
+——————————-+
| Picamera2 Backend |
| Hardware ISP (BGR888 Output) |
+—————+—————+
| Direct Zero-Copy Array
v
+——————————-+
| OpenCV Pipeline |
| – Gaussian Blur (21×21) |
| – cv2.accumulateWeighted() |
| – Absolute Delta & Threshold |
+—————+—————+
| Verified Contours > Min Area
v
+——————————-+
| Headless Systemd Supervisor |
| (Auto-boot, Auto-recover) |
+——————————-+
Bench Hardware Selection and Physical Assembly
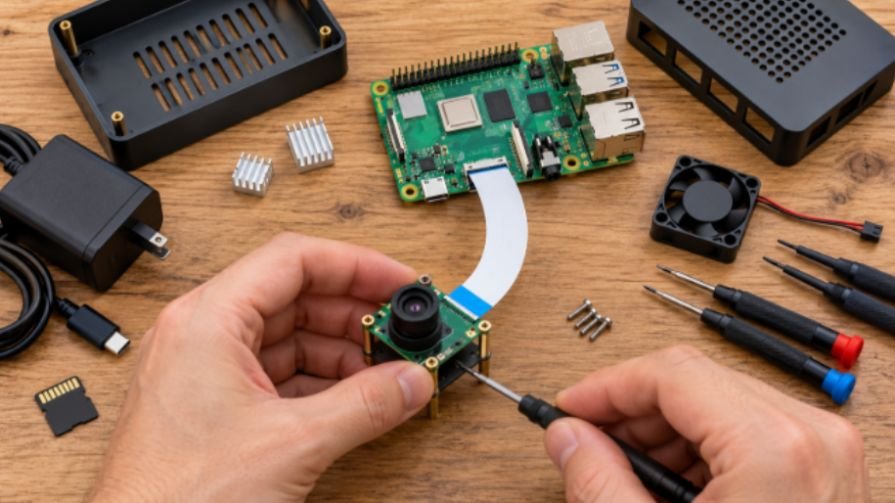
Vision inference places sustained operational demands on memory speed and thermal dissipation. I selected a Raspberry Pi 4 Model B (4GB), though a Raspberry Pi 5 runs cooler under equivalent processing loads.
When assembling Raspberry Pi-based hardware projects, a stable physical structure is just as important as reliable electronic components. For makers developing custom enclosures, mounting brackets, or integrated robotics platforms, this guide to 3D printing a robot chassis with Arduino offers practical insights into chassis design, component mounting, and structural considerations for hardware integration.
| Component | Choice | Operational Justification |
| SBC | Raspberry Pi 4 (4GB) or Pi 5 | Provides ample RAM for circular image buffers |
| Camera Sensor | Raspberry Pi Camera Module 3 | Sony IMX708 sensor with wide dynamic range and autofocus |
| Cooling | Aluminum Armor Heatsink Block | Prevents thermal throttling during 24/7 continuous inference |
| Storage | High-Endurance A2 MicroSD (32GB+) | Sustains repeated log and event writes without NAND wear-out |
| Power Supply | Official Raspberry Pi 15.3W PSU | Eliminates brownout drops caused by sudden processing spikes |
Choosing the Sensor: Camera Module 3 vs. USB Webcams
Off-the-shelf USB webcams introduce bus latency and consume additional CPU cycles decoding compressed UVC frames. Connecting an official sensor through the CSI ribbon connector bypasses the USB controller entirely and routes frames straight into the system-on-chip image signal processor (ISP).
During bench tests with fluctuating morning sunlight, the Camera Module 3 handled exposure adjustments instantly without generating false motion flags across high-contrast doorways.
Mounting and Ribbon Cable Routing
Handle the flexible flat ribbon cable delicately during installation. When seating the sensor onto your mounting bracket, use a magnetic precision screwdriver set to tighten the M2 nylon fasteners without cracking the sensor substrate.
If you are modifying a weatherproof outdoor housing, keeping that precision screwdriver set on hand ensures the enclosure gaskets compress evenly to seal out ambient moisture.
Configuring Raspberry Pi OS Bookworm for High-Throughput CV
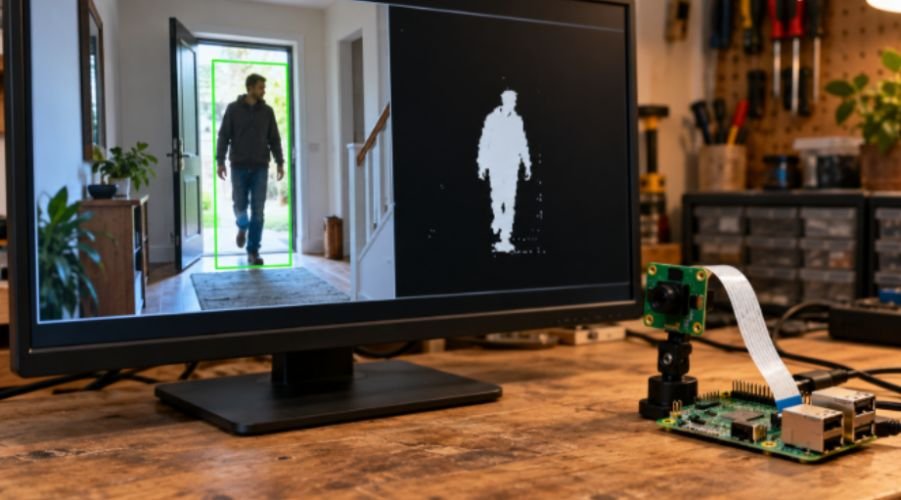
Raspberry Pi OS Bookworm enforces PEP 668 managed environments, stopping raw global package installs. The fastest, cleanest setup relies on pre-compiled Debian packages matched to an isolated virtual environment.
System Dependencies and Libcamera Libraries
Update your package registry and install the hardware-optimized binaries through apt:
Bash
sudo apt update && sudo apt upgrade -y
sudo apt install -y python3-picamera2 python3-opencv python3-imutils
Official Debian system packages link directly against ARM NEON SIMD vector extensions, bypassing long compilation cycles while boosting mathematical matrix transformations.
Managing the Python Virtual Environment
Create an isolated directory structure with inherit flags enabled:
Bash
mkdir ~/security_cam && cd ~/security_cam
python3 -m venv –system-site-packages venv
source venv/bin/activate
Passing –system-site-packages exposes the pre-compiled picamera2 and cv2 libraries cleanly inside your virtual environment.
Architecting the Motion Detection Engine
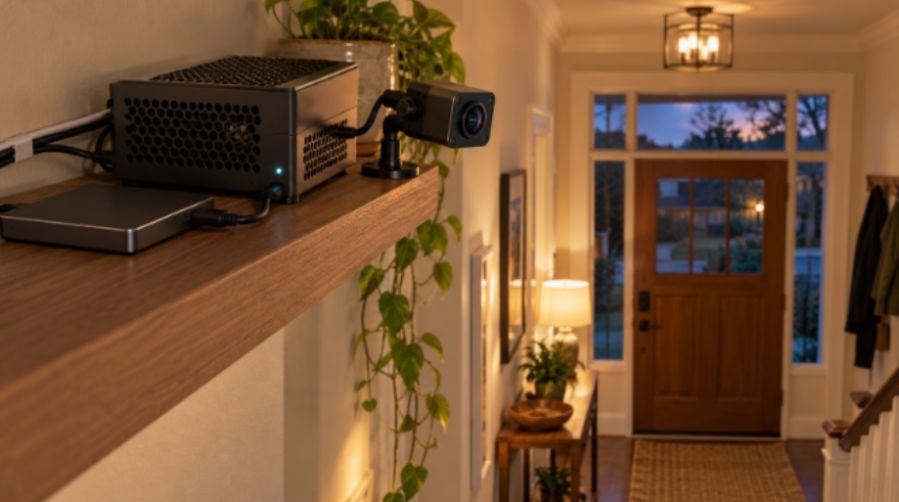
Early computer vision designs commonly captured a single initial frame as a permanent reference. This naive approach fails in real homes; changing cloud cover or artificial room lights alter pixel values globally, triggering nonstop false alerts.
We resolve this by applying an adaptive running average through OpenCV’s cv2.accumulateWeighted(), as detailed in the OpenCV Documentation. The background baseline dynamically absorbs gradual ambient light variations while highlighting fast-moving silhouettes.
Step-by-Step Computer Vision Pipeline
- Direct Memory Capture: Picamera2 captures raw frames directly into memory as a BGR888 NumPy array at 640×480 resolution.
- Frequency Filtering: A 21×21 Gaussian filter smoothes high-frequency sensor noise.
- Adaptive Accumulation: The floating-point running model absorbs background transitions at an alpha accumulation weight of 0.5.
- Binary Segmentation: cv2.absdiff calculates deviations, while thresholding and morphological dilation isolate coherent physical bodies.
Python
import time
from datetime import datetime
import cv2
import imutils
from picamera2 import Picamera2
# 1. Hardware Initialization via Picamera2
picam2 = Picamera2()
config = picam2.create_video_configuration(
main={“size”: (640, 480), “format”: “BGR888”}
)
picam2.configure(config)
picam2.start()
# Let auto-gain and exposure adjust to ambient light
time.sleep(2.0)
running_background = None
MIN_CONTOUR_AREA = 600
print(“[INFO] Background monitor active. Polling camera sensor…”)
try:
while True:
# Zero-copy capture directly to array
frame = picam2.capture_array()
gray = cv2.cvtColor(frame, cv2.COLOR_BGR2GRAY)
gray = cv2.GaussianBlur(gray, (21, 21), 0)
# Initialize background model
if running_background is None:
running_background = gray.astype(“float”)
continue
# Smoothly track ambient illumination transitions
cv2.accumulateWeighted(gray, running_background, 0.5)
frame_delta = cv2.absdiff(gray, cv2.convertScaleAbs(running_background))
# Threshold and dilate to consolidate motion blobs
thresh = cv2.threshold(frame_delta, 25, 255, cv2.THRESH_BINARY)[1]
thresh = cv2.dilate(thresh, None, iterations=2)
contours = cv2.findContours(thresh.copy(), cv2.RETR_EXTERNAL, cv2.CHAIN_APPROX_SIMPLE)
contours = imutils.grab_contours(contours)
motion_detected = False
for c in contours:
if cv2.contourArea(c) < MIN_CONTOUR_AREA:
continue
(x, y, w, h) = cv2.boundingRect(c)
cv2.rectangle(frame, (x, y), (x + w, y + h), (0, 255, 0), 2)
motion_detected = True
if motion_detected:
timestamp = datetime.now().strftime(“%Y-%m-%d %H:%M:%S”)
print(f”[EVENT] Verified motion registered at {timestamp}”)
except KeyboardInterrupt:
print(“\n[INFO] Manual termination received.”)
finally:
picam2.stop()
print(“[INFO] Sensor shut down cleanly.”)
Background Automation via Systemd Service
A production surveillance unit cannot rely on an open terminal session. Stripping out graphical user interface calls like cv2.imshow makes the script entirely headless.
Once your Raspberry Pi security camera is running reliably as a background service, you can apply similar automation principles to other connected monitoring projects. For another practical example of sensor-driven control and remote monitoring, explore this guide to building a DIY smart plant watering system using ESP32, which combines environmental sensing, automated responses, and IoT connectivity.
You can manage the process using Linux system services via the man7 Linux Systemd Manual.
Create the service unit file:
Bash
sudo nano /etc/systemd/system/securitycam.service
Paste the following unit configuration:
Ini, TOML
[Unit]
Description=Picamera2 OpenCV Motion Detection Service
After=network.target
[Service]
Type=simple
User=pi
WorkingDirectory=/home/pi/security_cam
ExecStart=/home/pi/security_cam/venv/bin/python3 -u /home/pi/security_cam/camera_monitor.py
Restart=always
RestartSec=5s
Environment=PYTHONUNBUFFERED=1
[Install]
WantedBy=multi-user.target
Enable and launch the service:
Bash
sudo systemctl daemon-reload
sudo systemctl enable securitycam.service
sudo systemctl start securitycam.service
Inspect the real-time operational logs using journalctl:
Bash
journalctl -u securitycam.service -f
Frequently Asked Questions
1. Can I build this using a Raspberry Pi Zero 2 W?
Yes, the Pi Zero 2 W handles 640×480 frame processing smoothly with minimal power draw.
2. Why does shifting outdoor sunlight trigger false motion alerts?
Sudden intensity shifts cause delta spikes; increase MIN_CONTOUR_AREA or tune the accumulateWeighted alpha parameter.
3. How do I record video files when movement occurs?
Initialize an OpenCV VideoWriter object using the mp4v codec inside the motion verification block.
4. Does OpenCV run hardware acceleration on Raspberry Pi OS?
OpenCV utilizes ARM NEON CPU vectorization, while picamera2 offloads camera capture directly to the GPU.
Take Back Control of Your Footage
Running your own edge surveillance appliance proves you do not need proprietary subscriptions to secure your property. Your video feeds never leave your local subnet, your hardware keeps running during internet outages, and you maintain complete sovereignty over your data.
To take this build further, hook the motion detection loop into a local MQTT broker or pipe alerts straight to a self-hosted matrix server for immediate smartphone push notifications.