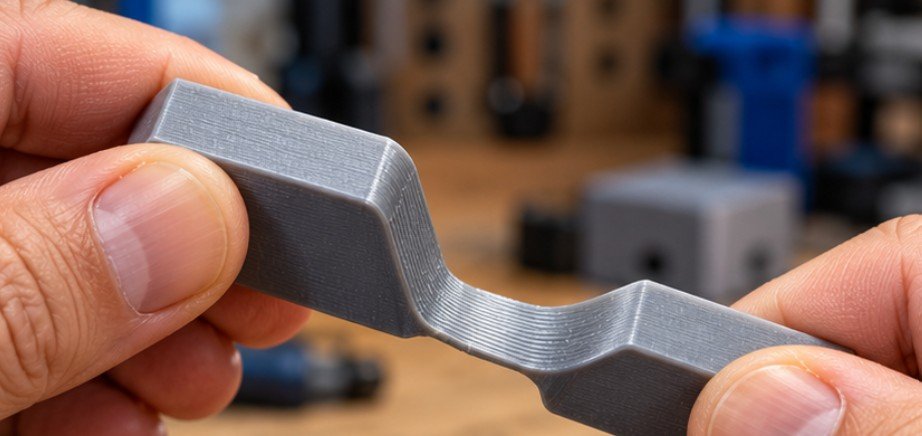
A 3D-printed hinge usually fails for a surprisingly simple reason: the printer did exactly what the designer asked. A hinge that is too thick, bends across weak layer interfaces, or ends abruptly at a sharp corner concentrates strain until the plastic tears.
Learning how to 3d print flexible hinges that bend without breaking means designing for controlled deformation rather than maximum strength. A successful living hinge is deliberately thin, smoothly connected to the surrounding part, and oriented so the printed strands support the bending motion instead of splitting apart. That distinction can turn a hinge that survives ten bends into one capable of repeated daily use.
Why Printed Living Hinges Fail Differently From Molded Ones
A living hinge is a thin section of material connecting two thicker sections of the same part. Instead of rotating around a pin, the material itself flexes.
Injection-molded products can make extremely durable living hinges because the polymer flows continuously through the hinge. Fused filament fabrication, or FFF, creates a different structure. The printer deposits neighboring roads of molten polymer and stacks them layer by layer.
The National Institute of Standards and Technology notes that polymer material-extrusion parts can develop pores, imperfect interfaces, and directional mechanical properties. NIST researchers have also shown that temperature and processing conditions influence bonding between deposited polymer roads.
For more background on the process itself, see how 3D printing works. The practical lesson is straightforward: a hinge is only as reliable as its weakest printed direction.
Start With the Right Filament
Geometry matters, but no clever hinge design can completely compensate for a brittle polymer.
TPU for Maximum Flexibility
Thermoplastic polyurethane, or TPU, is usually the easiest choice when the entire component can be flexible. It tolerates large deformation and springs back better than typical rigid filaments.
Soft TPU can make extremely forgiving hinges, although the surrounding component may become more flexible than you want. Firmer TPU grades are useful when the part needs both shape retention and repeated bending.
Nylon for Tough Functional Parts
Nylon is another strong candidate because many grades combine toughness with substantial elongation before fracture.
Its main drawback is moisture absorption. Wet nylon can print inconsistently, producing bubbles, rough extrusion, and weaker bonds. Drying and proper filament storage therefore matter more than they do with many hobby filaments.
Research organizations continue studying how polymer chemistry and processing affect printed performance. Oak Ridge National Laboratory, for example, describes interlayer bonding and solidification behavior as fundamental factors in fused-filament polymers extrusion-based additive manufacturing.
PETG for Simple Prototypes
PETG can work surprisingly well for moderate-flex hinges. It normally bends more willingly than standard PLA while remaining easy to print on consumer machines.
It is a useful choice for lids, clips, enclosures, and prototypes that will not undergo enormous numbers of cycles.
PLA can produce a working demonstration hinge, but conventional PLA is generally a poor choice for repeated flexing because it tends to behave more rigidly. Specialized PLA blends can behave differently, so evaluate the manufacturer’s mechanical data rather than relying only on the material name.
For a broader look at the possibilities of additive manufacturing, explore how 3D printers can print food and how the process works, including how material properties influence the final printed product.
The Geometry That Makes a Hinge Survive
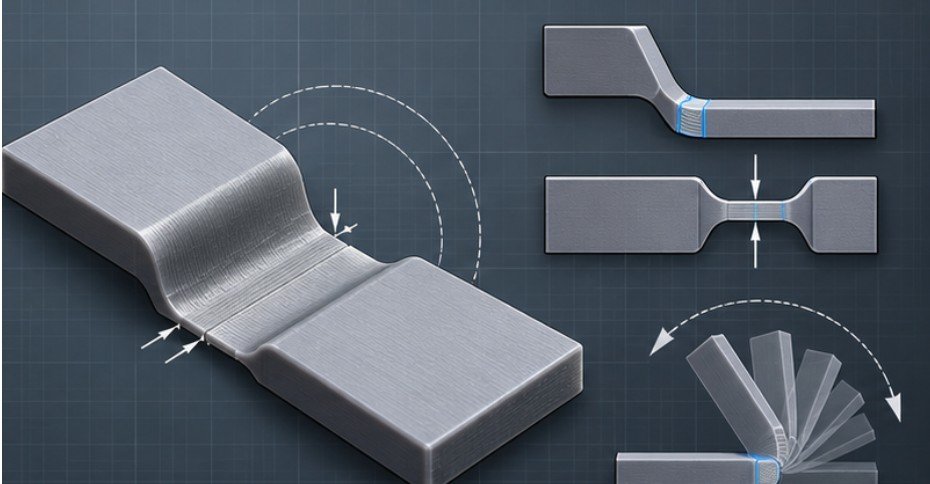
For how to 3d print flexible hinges that bend without breaking, the most important design principle is spreading strain over an area rather than forcing all movement through one crease.
A useful starting point for small FFF hinges is approximately 0.4–0.8 mm thick, with experimentation extending toward 1 mm for tougher materials or larger designs. There is no universal thickness because nozzle diameter, polymer, hinge width, bend angle, layer height, and print temperature all change the result.
Make the flexible section several millimeters long whenever space allows. A longer hinge produces a broader bend radius, while an extremely short hinge behaves almost like a scored fold line.
Most importantly, add generous fillets where the thin hinge joins the thick body. Sharp internal corners act as stress concentrators.
The U.S. Department of Energy highlights how polymer behavior during manufacturing influences the properties of the finished material, reinforcing why geometry and processing cannot be considered independently.
Print Orientation Can Matter More Than Infill
One of the worst arrangements is printing a thin hinge upright so repeated bending tries to separate stacked layers.
Material-extrusion components are anisotropic: their strength can change depending on loading direction. MIT research describing extrusion polymer layer bonding in additive manufacturing notes that polymer welds between deposited layers can be weaker than the bulk material and depend on sufficient heat and molecular diffusion at the interface.
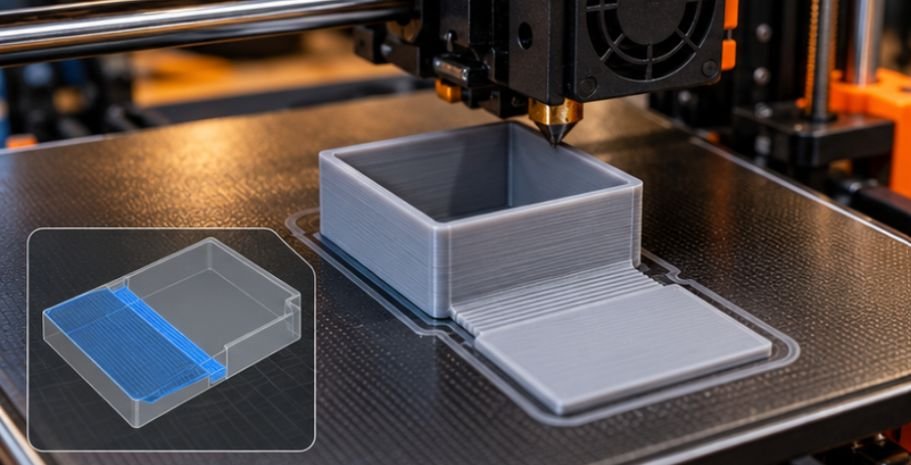
Whenever the model permits it, place the hinge flat on the build plate so its bend occurs primarily within continuous deposited paths rather than peeling one layer away from another.
That may require redesigning the rest of the object around the hinge instead of simply rotating the finished CAD model in your slicer.
Tune the Print for Layer Bonding, Not Just Appearance
Print temperature should be high enough to achieve reliable fusion without causing excessive stringing, sagging, or polymer degradation.
NIST research has connected extrusion conditions, layer geometry, temperature, and interfacial bonding with the mechanical properties of FFF parts. That means the prettiest-looking temperature tower setting is not automatically the strongest hinge setting.
Because layer adhesion and print settings also determine whether a printed object can retain liquids, this practical guide to 3D printing watertight containers that do not leak offers further insight into improving print reliability and minimizing gaps between deposited layers.
Avoid excessive cooling during the hinge layers if the material manufacturer recommends reduced fan use. Overcooling deposited polymer can reduce the opportunity for neighboring roads to bond.
Use enough walls for the thicker body, but do not accidentally turn the flexible strip into a massive solid beam. Inspect the slicer’s layer preview before printing.
Run a Bend-Cycle Test Before Printing the Full Part
Do not test a new hinge design by printing a six-hour enclosure. Create a small coupon containing the exact hinge cross-section and print several versions. For example, test 0.4, 0.6, 0.8, and 1.0 mm thicknesses while keeping everything else identical.
Flex each coupon through the intended angle 25 times, inspect it, then continue to 100, 250, and 500 cycles. Look for whitening, permanent deformation, delamination, surface cracks, or tearing at the hinge roots.
The National Science Foundation describes additive manufacturing as a digital, layer-by-layer process that enables rapid iteration of complex designs. Living-hinge coupons are an ideal example: iteration costs little compared with discovering a weakness after producing the entire component.
Common Fixes for Hinges That Keep Breaking
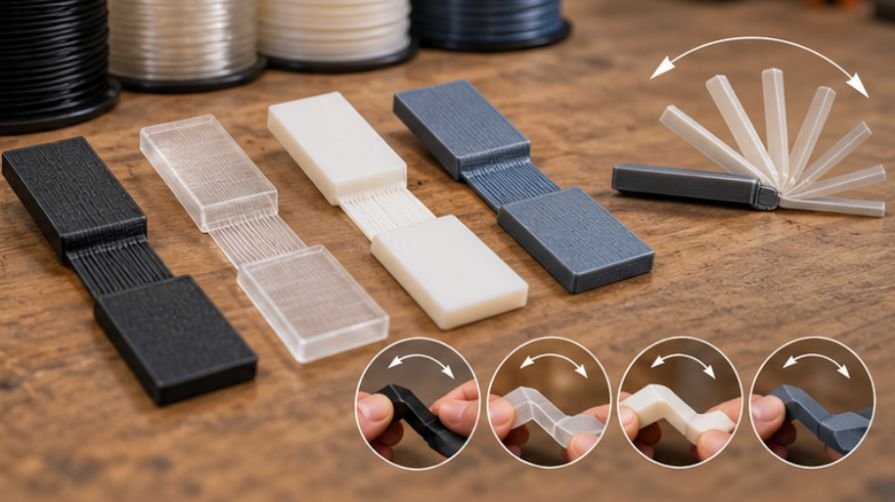
If the hinge cracks at its center, make the flexible region thinner or longer. If cracks begin where the hinge meets the body, increase the transition radius.
If layers separate, change the orientation first. Then investigate nozzle temperature, extrusion consistency, cooling, moisture, and print speed.
If the hinge bends once but stays permanently folded, the material may be undergoing plastic deformation rather than elastic recovery. Changing to TPU or nylon may solve the problem more effectively than endlessly adjusting slicer settings.
For load-bearing, safety-critical, medical, automotive, or structural components, hobby testing is not enough. Printed polymer properties depend heavily on material condition and manufacturing parameters, which is one reason NIST maintains testing and measurement programs specifically for polymer additive manufacturing.
Frequently Asked Questions
1. What filament is best for a 3D-printed flexible hinge?
TPU is usually best for highly flexible hinges. Nylon works well when toughness and a more rigid surrounding structure are needed. PETG can handle moderate-duty hinges and prototypes.
2. How thin should a 3D-printed living hinge be?
Around 0.4–0.8 mm is a useful FFF starting range, but the ideal thickness depends on material, nozzle size, hinge length, bend angle, and required cycle life.
3. Should a living hinge be printed vertically?
Usually not. Printing it flat generally avoids placing repeated bending loads directly across weak interlayer interfaces, although the best orientation ultimately depends on the geometry.
4. Why does my printed hinge turn white before breaking?
Whitening often indicates localized plastic deformation or microscopic damage. Increase the hinge length or radius, reduce strain, or switch to a tougher, more flexible polymer.
Build the Hinge Around the Bend
The secret to a durable printed hinge is not making it stronger everywhere. It is making one carefully designed area flexible enough that stress never becomes concentrated enough to destroy it.
Choose a polymer that tolerates repeated deformation, give the hinge room to curve, round its transitions, and orient the print so bending works with the deposited material rather than against weak layer interfaces. Then print small test coupons and cycle them before committing to the final model. That inexpensive experiment will teach you more about how to 3d print flexible hinges that bend without breaking than another dozen failed full-size prints.