

A 3D printer can reproduce details fine enough to show fingerprints, sanding scratches, and individual layer lines—and silicone will faithfully copy nearly all of them. That is both the strength and the danger of this mold-making method.
Learning how to 3d print custom silicone molds for resin casting is therefore less about pouring rubber around a printed object and more about controlling surface finish, chemistry, mold geometry, and trapped air. Get those four factors right, and one digital model can become dozens of consistent epoxy or polyurethane castings.
Why Print a Master Instead of Printing the Final Mold?
For most hobby and small-production projects, the 3D printer should create the master pattern rather than the rigid mold used to cast the final resin part.
A hard plastic negative can work for simple shapes, but undercuts, hooks, recesses, and textured surfaces may mechanically lock a cured resin part inside it. Flexible RTV silicone stretches during demolding, making far more complicated geometry practical.
Stanford University’s Product Realization Lab describes RTV silicone molding as a process used to create defined flexible mold cavities and notes that 3D printing can be incorporated into mold fabrication. The basic workflow becomes:
CAD model → printed master → finished master → mold box → liquid silicone → flexible negative mold → cast resin part.
If you are interested in how additive manufacturing reached the point where workflows like this are practical on a desktop, see the history behind why 3D printing was invented.
Start With Mold-Friendly CAD, Not Just a Good-Looking Model
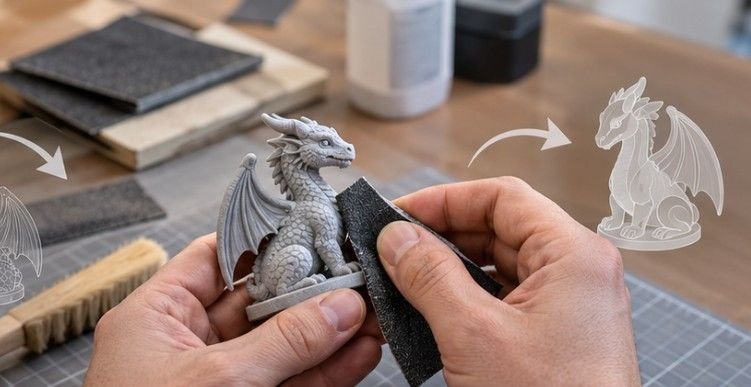
A model that prints successfully is not automatically a good molding master. Whenever possible, give vertical walls a slight draft rather than making them perfectly perpendicular. Even a few degrees of taper can reduce the force needed to remove the finished cast. Avoid deep reverse angles unless you deliberately plan a split or two-part silicone mold.
Think about the parting line before printing. A flat-backed coaster, badge, knob, or decorative panel usually works well with a one-piece open-face mold. A figurine or mechanical housing may need a two-part mold because silicone must surround the object.
You also need enough silicone around the model. Walls that are too thin can distort when resin is poured into them. For small desktop parts, leaving roughly 1/2 inch of silicone around vulnerable areas is often a sensible starting point, although larger or heavier castings may require substantially more support.
FDM or Resin Printing: Which Makes a Better Master?
Both work, but they demand different finishing strategies.
| Master type | Main advantage | Main problem | Best use |
| FDM PLA/PETG | Cheap and easy to print | Visible layer lines | Larger functional shapes |
| SLA/DLP resin | Excellent detail and smoother surfaces | Possible silicone cure inhibition | Miniatures and detailed masters |
| Filled/primed FDM | Low cost with improved finish | More sanding work | Medium-detail prototypes |
A resin printer usually wins when tiny lettering, textures, or sculpted details matter. FDM is often more economical for a large mold master or mold box.
Whichever method you choose, dimensional accuracy matters because every printing error becomes a molding error. Before committing to an expensive silicone pour, check critical dimensions using the techniques in this guide to measuring 3D print accuracy.
How to 3D Print Custom Silicone Molds for Resin Casting: The Practical Workflow
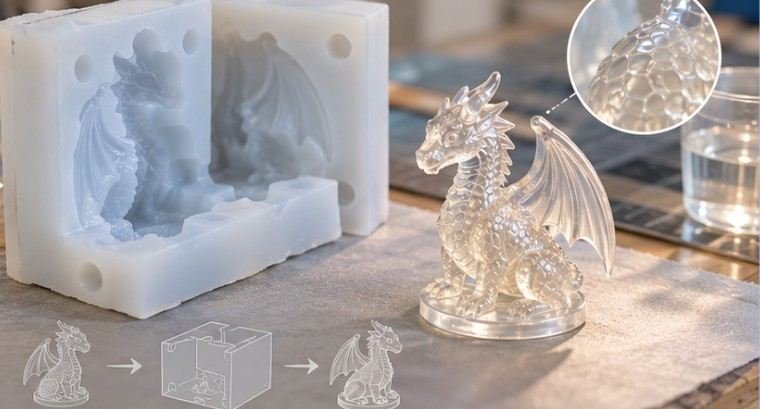
1. Build a Leakproof Mold Box
The box only needs to hold uncured silicone, but leaks can waste an entire batch. You can print a reusable modular box, use acrylic panels, or build a temporary enclosure around the master. Secure the model firmly to the floor so buoyant force cannot lift it after silicone enters the box.
Seal every seam. Carnegie Mellon University’s mold-making documentation similarly shows the master fixed inside a container before liquid silicone is mixed and poured.
2. Calculate How Much Silicone You Need
You can reduce expensive guesswork with a simple volume estimate.
For a rectangular mold box:
Silicone volume = internal box volume − master volume
If your box measures 6 × 4 × 2 inches, its maximum volume is 48 cubic inches. If the master occupies approximately 10 cubic inches, you need about 38 cubic inches of silicone, plus a small margin for material left in the mixing cup. CAD software can often calculate the master’s volume automatically.
3. Mix by the Manufacturer’s Ratio
Do not assume every silicone is 1:1. Some products mix equally by volume, others by weight, and others use very different ratios. Follow the technical data sheet rather than a generic online recipe.
Use a digital scale when the formulation specifies weight. Scrape the cup walls and bottom while mixing, but avoid whipping air into the material.
4. Pour From One Low Corner
Do not dump silicone directly onto the top of your model.
Pour a thin continuous stream into the lowest corner and allow the silicone level to rise naturally around the master. This gives displaced air somewhere to escape instead of trapping it beneath lettering, overhangs, or recessed details.
Vacuum degassing can remove entrained air from suitable silicones. UCLA’s fabrication lab demonstrates using a vacuum degasser as part of a 3D-printed mold workflow. UCLA 3D printing and vacuum-degassing example
A pressure pot performs a different job: rather than extracting bubbles, it compresses them until they become extremely small. Whether vacuum, pressure, or neither is appropriate depends on the silicone and casting resin being used.
5. Let Chemistry Set the Schedule
A mold that feels firm on top may not have reached full cure.
Respect the manufacturer’s demold time and temperature range. Pulling the master early can permanently stretch fine details or tear thin features.
Once cured, remove the mold-box walls and peel the silicone from the master gradually instead of yanking it free. Trim flashing carefully with a sharp hobby knife or scissors.
Casting Resin Without Ruining Your New Mold
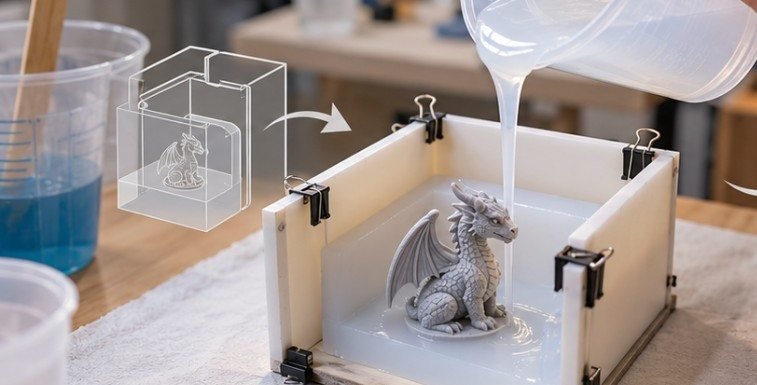
Once you know how to 3d print custom silicone molds for resin casting, the final resin pour can feel deceptively simple. It still deserves the same discipline.
Keep both the resin and mold dry, measure resin components accurately, and mix without aggressively introducing bubbles. Thin streams and properly located vents help air escape from complicated cavities.
Wear appropriate gloves and eye protection and work with ventilation suitable for the materials involved. CDC warns with guidance for safer 3D printing that additive manufacturing can involve chemical, particulate, and dermal exposures, while uncured epoxy and resin components may present additional hazards.
Always follow the product’s Safety Data Sheet rather than treating “resin” as a single chemical with universal precautions.
A Five-Minute Pre-Pour Check
Before sacrificing an expensive container of silicone, inspect the project one last time. Confirm that the master is completely finished, clean, dry, and firmly attached. Verify that every mold-box joint is sealed. Check the silicone mixing ratio and working time. Perform a compatibility test if the master came from a resin printer.
Finally, visualize where air will travel as silicone rises around the object. If you can already identify a pocket where air has nowhere to escape, redesign the orientation before pouring. That short inspection prevents more failures than sophisticated equipment can rescue afterward.
FAQ
1. Can I pour silicone directly over a resin 3D print?
Sometimes, but test compatibility first. Fully wash and post-cure the print because residual photopolymer chemistry can inhibit certain platinum-cure silicones.
2. Do I need mold release on a 3D-printed master?
It depends on the master and silicone. A compatible release agent can simplify demolding, particularly with porous or complex surfaces, but always confirm compatibility first.
3. How thick should a silicone mold be?
Small molds often work with roughly 1/2 inch around vulnerable areas. Large, heavy, or highly flexible molds may require thicker walls or a rigid supporting mother mold.
4. Is a vacuum chamber required?
No. Careful mixing and slow corner pouring can produce good molds. Vacuum degassing becomes more valuable for highly detailed molds or silicones that easily retain entrained air.
The Print Is Only as Good as the Mold It Creates
The surprising part of silicone mold making is that the 3D printer usually does the easiest job. Success depends on everything that happens afterward: removing layer lines, verifying chemical compatibility, giving trapped air an escape route, measuring accurately, and respecting cure times.
That is what makes how to 3d print custom silicone molds for resin casting such a useful bridge between digital fabrication and small-scale manufacturing. Print one accurate master, refine it carefully, test your materials before committing, and the silicone mold can reproduce that work repeatedly without requiring another print.








