A tiny motor can spin happily in sunlight, then stop the moment its crawling legs touch the ground. For a Solar powered crawling robot build, I’d tackle that problem before adding decorative parts or extra weight.
My approach starts with a matched solar kit and checks each mechanical stage separately. You’ll build a battery-free crawler, learn what limits its movement, and locate faults without forcing fragile gears.
Choose Parts That Work Together
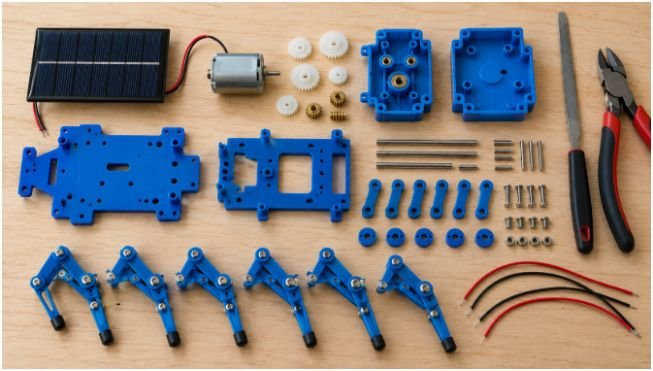
For a first build, I’d choose a solar robotics kit containing a panel, motor, reduction gearbox, and crawling configuration. Matched components remove much of the guesswork around motor voltage and available current.
Look for a downloadable manual, clear gear diagrams, and replacement-part support. Elenco’s TEACH TECH manuals provide a useful example of model-specific documentation, including SolarBot.14 instructions.
You’ll also need flush cutters, a fine file, small screwdrivers where required, and a clear parts tray. A multimeter helps diagnose electrical problems but isn’t essential for basic assembly.
For a custom chassis, choose lightweight parts and check the motor’s specifications before buying a panel. A panel’s advertised voltage alone doesn’t establish compatibility.
Keep the kit’s supplied gearing for your first attempt. Changing several components together makes troubleshooting much harder.
How Solar Cells and Reduction Gears Create Motion
A solar cell converts incoming light into electricity. Its output depends partly on light intensity and wavelength, as explained by the Department of Energy’s photovoltaic cell overview.
The motor turns quickly, while reduction gears trade speed for greater output torque. An offset crank or cam then converts rotation into repeated leg movement.
Forward crawling also requires useful ground contact. If the feet slide equally during both halves of their cycle, the robot may shuffle without advancing.
I’d keep the first Solar powered crawling robot build mechanically simple. A broad support stance reduces the balancing demands associated with a bipedal walking robot.
Extra equipment, such as the screen on a telepresence robot, would add load this small power system may struggle to move.
Assemble the Solar Motor and Crawling Mechanism
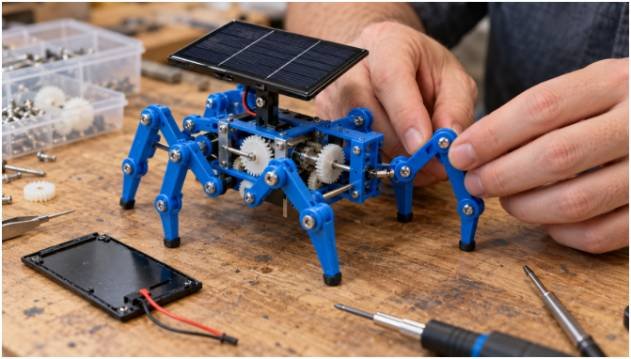
Prepare the Parts and Gearbox
Identify each component before cutting it from the sprue. Some similar-looking gears have different tooth counts or shaft positions.
Trim attachment tabs carefully and file raised plastic flush. Remove loose debris before closing the gearbox.
Avoid shaving tooth profiles or enlarging axle holes. Those changes can introduce poor meshing and permanent misalignment.
Seat the motor, gears, and shafts exactly as the manual shows. Check that the housing closes without trapping wires or squeezing an axle sideways.
Keep the panel covered during assembly. Fingers should stay clear of exposed gears whenever power is connected.
Connect and Position the Solar Panel
Follow the kit’s terminal markings and wiring diagram. Red commonly indicates positive, but confirm the actual connections.
Secure wires away from gears and moving legs. Leave enough slack to adjust the panel without pulling its terminals.
Mount the panel where the chassis won’t shade it. Aim its face toward direct sunlight during the first test.
A battery-free crawler has no stored energy to carry it through shade. Clouds or your hand crossing the panel can interrupt movement.
Install the Crawling Legs and Cams
Attach the cranks, cams, and legs in the sequence shown by the manufacturer. Match the specified left-right positions and timing marks.
Don’t assume every crawler needs a 180-degree phase offset. Different mechanisms use different movement patterns.
Check that pivot joints move freely without excessive looseness. Watch for feet touching the chassis or linkages reaching a locked position.
For this Solar powered crawling robot build, I’d postpone cosmetic additions until the bare mechanism crawls reliably.
Test Your Robot Before Adding More Load
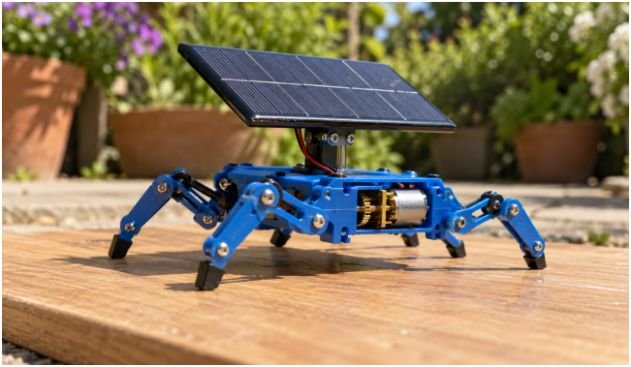
Start outside in direct sunlight on a dry, smooth surface. A level board or patio tile makes mechanical problems easier to spot.
First, support the chassis so its legs can move without touching the ground. Keep hands away from the mechanism.
Then place it down and compare its behavior. Legs that cycle freely in the air but stop on contact suggest insufficient power under load or excessive resistance.
Ordinary indoor LEDs usually provide too little light for these kits. However, LEDs aren’t inherently incapable of powering solar cells.
Use an artificial lamp only when the manufacturer specifies a suitable test method. Halogen bulbs become hot; don’t adopt a universal distance such as six inches.
Switch off or cover the panel promptly when the mechanism stalls. Pololu’s brushed gearmotor guidance explains that stalls can cause rapid motor damage. Its published ratings apply to those motors, not your miniature kit.
Troubleshoot Gear Binding and Motor Stalls
Separate Electrical Problems From Mechanical Drag
Disconnect the motor from the gearbox if the design permits. Test the unloaded motor with its panel in direct sunlight.
If it fails to spin, inspect connections, shading, and terminal contact before reopening the mechanical assembly.
A separate battery test is appropriate only when its voltage matches the motor’s specifications. Don’t assume every kit motor accepts a 1.5-volt AA cell.
Next, measure panel voltage with the motor disconnected, then connected. Keep the meter in voltage mode across the terminals.
For a Solar powered crawling robot build, a healthy-looking unloaded voltage can still conceal inadequate output under load.
Fix Axle Alignment and Linkage Resistance
With power isolated, inspect the gearbox for debris, displaced shafts, and rubbing gear faces.
Don’t force the final output axle to back-drive the reduction train. Resistance can be amplified through the gears and damage plastic teeth.
Use the manual’s permitted inspection method. Turning an accessible input gear gently may help, provided the design allows it.
Check each linkage for rubbing, tight pivots, or incorrect timing. Change one fault at a time, then retest.
Avoid adding lubricant automatically. Use only a manufacturer-approved product compatible with the plastic, and apply it sparingly.
If the crawler veers, compare both sides for unequal drag before changing the panel or motor.
Measure Progress With a Simple Crawl Test
I’d use a repeatable test instead of judging success by how enthusiastically the legs wiggle.
Mark a 12-inch course on a level board. Record travel time, surface, sunlight conditions, and whether the robot starts without a push.
Here’s a hypothetical electrical example: a panel reads 2.0 volts unloaded but drops to 0.9 volts during attempted movement. That drop suggests the operating load exceeds what the panel can supply under those conditions. It doesn’t identify the cause by itself.
Removing the legs provides the next clue. If gearbox operation improves, inspect linkage drag and ground contact. If it remains weak, investigate the panel, connections, and gearbox.
This comparison gives your Solar powered crawling robot build a useful diagnostic record without claiming laboratory precision.
Make the Sun Do the Legwork
I’d call the project successful when the crawler starts unaided, moves consistently, and survives repeated runs without binding.
Keep weight low, joints free, and the panel unshaded. Your next step is simple: complete three runs on the same course before changing anything. A reliable little crawler beats a heavily decorated robot that needs a finger-powered rescue.
Frequently Asked Questions
1. Can a Solar powered crawling robot build work without batteries?
Yes, a matched panel and motor can run directly in sufficient light, but movement stops when available power falls.
2. Why does my solar crawling robot stop on the ground?
Ground contact adds load, exposing weak illumination, binding linkages, poor traction, or insufficient motor torque.
3. Can I test a solar robot under LED lighting?
Yes, sufficiently intense suitable LED lighting can work, although ordinary room lighting usually cannot power the kit.
4. Do I need an Arduino to build a solar crawling robot?
No, a basic kit uses a solar panel, motor, gears, and mechanical linkages without programmable control.