A box full of failed PLA prints looks like reusable raw material, but simply melting everything together is one of the fastest ways to make terrible filament. Plastic type, moisture, contamination, thermal history, and even particle size affect what comes out of a desktop extruder.
Learning how to recycle failed 3d prints into new filament at home is therefore less about melting scrap and more about controlling variables. Done carefully, failed models, support structures, purge lines, and calibration pieces can become useful filament for prototypes and everyday prints. The process is technically achievable. The harder question is whether you can produce filament consistent enough to print reliably.
What Actually Happens When a 3D Print Gets Recycled?
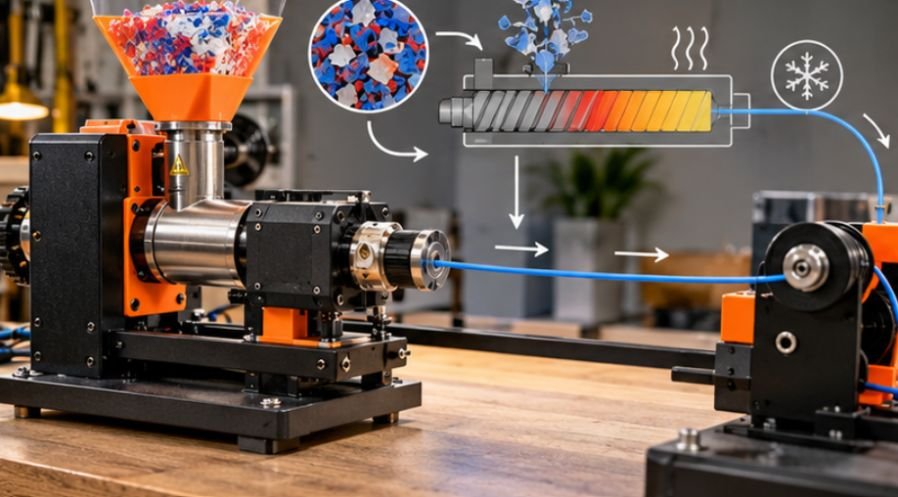
Home filament recycling is a form of mechanical recycling. You sort the material, clean it, reduce it into flakes, dry it, melt it through an extruder, cool the new strand, and wind it onto a spool.
The U.S. Environmental Protection Agency describes mechanical recycling as a process involving operations such as sorting, cleaning, shredding, and remelting plastic. It also notes that variation in incoming plastic can lead to inconsistent recycled-material properties. That variability becomes especially important with filament because a desktop printer expects remarkably consistent feedstock.
A thick section of filament can jam the extruder. A thin section may under-extrude. Moisture can create bubbles. A few flakes of PETG mixed into PLA can change melt behavior enough to make an otherwise good batch unpredictable.
Start With Sorting, Not Shredding
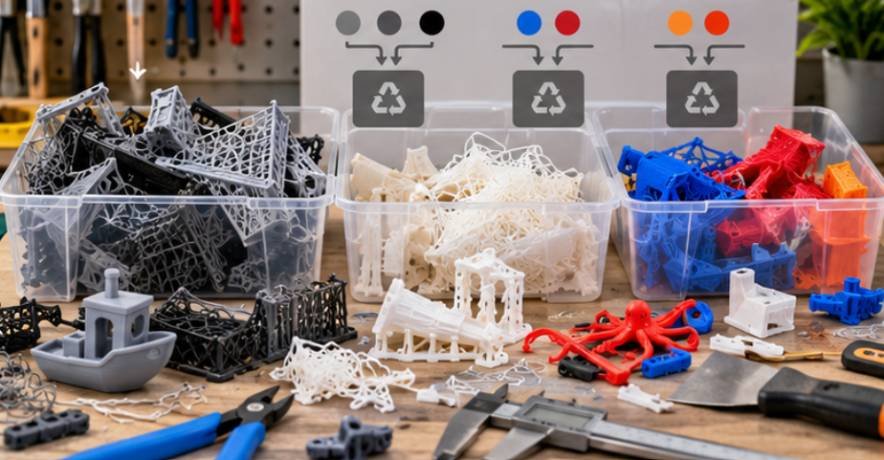
The first rule is simple: never treat your failed-print bin as one homogeneous plastic supply. Keep PLA, PETG, ABS, TPU, nylon, polypropylene, and specialty filaments separate. Even materials carrying the same broad polymer name may contain different pigments, fillers, impact modifiers, or fibers.
The EPA notes that plastics are divided into multiple polymer categories and that recycling compatibility depends heavily on resin type.
For a first home-recycling experiment, I would use plain PLA from a single known manufacturer. Avoid glow-in-the-dark filament, carbon-fiber blends, wood-filled materials, flexible filament, and mystery scraps until you understand your equipment.
Remove magnets, screws, threaded inserts, tape, adhesives, labels, paint, dirt, and pieces of support material printed from another polymer.
The Six-Step Home Filament Recycling Workflow
1. Collect a Clean Batch
Save failed prints in labeled containers. Record the filament brand and material when practical. Consistency matters more than volume. Two pounds of known PLA is more useful than ten pounds of mixed plastic whose origin you cannot verify.
2. Break the Prints Into Small Flakes
Desktop filament extruders generally cannot swallow whole Benchys and support towers. A purpose-built plastic shredder or granulator reduces the material into relatively uniform chips. Depending on the extruder, flakes around several millimeters across are much easier to feed consistently than large irregular fragments.
Avoid office paper shredders and kitchen blenders. They were not designed for rigid thermoplastics, and damaged blades or motors are a realistic possibility.
Michigan Technological University researchers demonstrated an open-source “Recyclebot” approach capable of converting waste thermoplastics into filament, showing that small-scale distributed recycling is technically possible rather than merely theoretical.
3. Dry the Shredded Plastic
Moisture is a quiet filament killer. Hygroscopic polymers absorb water from the air. During extrusion, moisture can vaporize or accelerate polymer degradation, producing bubbles, inconsistent flow, weak material, and rough filament.
Use a controlled filament or pellet dryer appropriate for your polymer rather than guessing at oven temperatures. Temperature recommendations vary by resin and formulation, and overheating PLA can soften or deform flakes before they ever reach the extruder.
RIT researchers working with recycled PET, for example, deliberately dried shredded material before extrusion to reduce moisture-related degradation.
4. Consider Blending Recycled and Virgin Material
You can attempt 100% recycled PLA, but blending recycled flakes with virgin pellets often produces a more forgiving feedstock.
A useful experimental starting point is roughly 50% recycled material and 50% virgin material, followed by test prints. This is not a universal formula; polymer grade, previous print temperatures, additives, extrusion conditions, and recycling history all matter.
Research conducted through RIT has examined virgin/recycled PLA blends and found that recycled PLA can remain usable, although properties such as toughness and ductility may differ from conventional filament. Why blend at all? Every heating cycle can shorten polymer chains.
A Clemson University thesis examining mechanically recycled PLA found declining performance over successive recycling generations, including reductions in tensile strength and reliable printability after repeated processing.
5. Extrude the New Filament
Feed the dry flakes or pellet blend into a desktop filament extruder such as a commercial filament-making unit or a properly built DIY extruder.
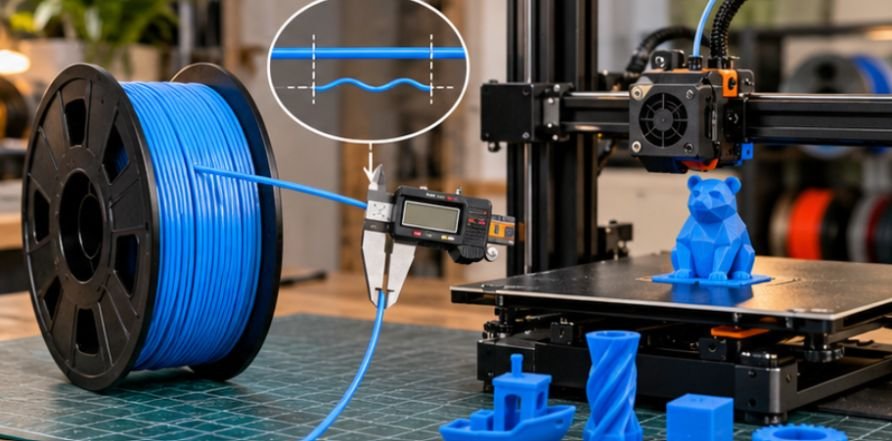
The machine heats the polymer and pushes it through a die. Your real target is not simply “1.75 mm filament.” It is stable 1.75 mm filament over the entire spool.
Extrusion temperature, screw speed, cooling rate, puller speed, die size, and spooler tension interact. Changing one variable can change diameter several feet downstream.
Never assume the normal nozzle temperature from your 3D printer is automatically the correct extrusion-barrel setting. Follow the extruder manufacturer’s material guidance and adjust experimentally.
While desktop filament extrusion is suited to recycling thermoplastics, metal additive manufacturing involves substantially different material requirements and process controls. For a closer look at these distinctions, explore whether it is possible to 3D print rocket engine nozzles out of metal at home, including the specialized equipment and technical challenges involved in producing metal components.
6. Measure Before You Print
Use digital calipers to check filament diameter repeatedly along the strand.
| Check | What You Want | Warning Sign |
| Material | One known polymer | Mixed PLA/PETG/ABS |
| Flakes | Clean, fairly uniform | Dust or large chunks |
| Filament surface | Smooth | Bubbles or roughness |
| Diameter | Stable near printer specification | Frequent thick/thin sections |
| Bend test | Flexible enough to spool | Snaps easily |
| Test print | Steady extrusion | Clicking or inconsistent lines |
Measure at different rotations because filament can be oval rather than perfectly round.
Only spool material that remains acceptably consistent.
Accurate dimensional checks are essential for determining whether recycled filament meets the tolerances required for reliable printing. For a more detailed understanding of dimensional verification, explore this guide to measuring 3D print accuracy, which explains how to assess printed dimensions and identify deviations that can compromise the final result.
Once recycled filament meets consistent diameter and extrusion standards, it can be evaluated for specific functional applications. For projects requiring reliable liquid containment, follow this guide on how to 3D print watertight containers that do not leak, which explains how wall thickness, extrusion calibration, layer bonding, and leak testing affect the finished print.
Why Recycled PLA Can Become More Brittle
Every trip through a hot extruder exposes PLA to heat and mechanical shear. Research on recycled PLA has documented molecular-weight reduction from repeated processing, which can eventually lower mechanical performance.
That explains a common home-recycling mystery: a first recycled batch may print surprisingly well, while material recycled repeatedly becomes fragile.
Treat recycled filament as material with a known history. Mark the spool “Recycle 1,” “Recycle 2,” and so forth rather than endlessly returning scraps to the same bin.
ASTM also emphasizes the importance of defining and evaluating polymer feedstock characteristics in additive manufacturing.
Is Recycling Failed Prints at Home Actually Worth It?
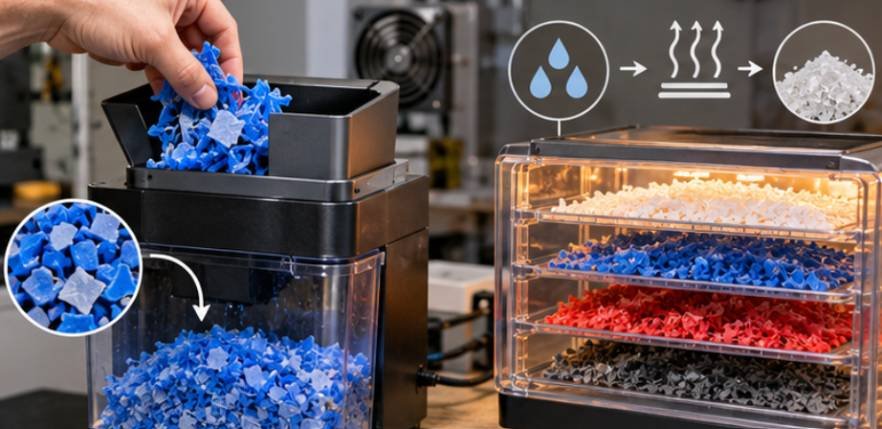
Financially, not always. A complete setup may require a shredder, dryer, filament extruder, diameter-control system, puller, and spooler. That can cost considerably more than several years of ordinary filament purchases for a casual hobbyist.
The economics improve for makerspaces, print farms, schools, labs, and heavy users producing kilograms of homogeneous scrap. The environmental calculation is also more nuanced than “recycled equals zero waste.” Electricity, failed recycling batches, contamination, and new virgin material still matter.
The U.S. National Science Foundation has highlighted projects exploring reclaimed plastic as additive-manufacturing feedstock, reflecting broader interest in localized material reuse. NSF examples of reclaimed plastic for 3D printing
Frequently Asked Questions
1. Can I make 100% recycled 3D printer filament?
Yes, technically, but quality depends on polymer condition and extrusion control. Blending recycled plastic with virgin material often improves consistency when repeatedly processed plastic has become brittle.
2. Can I recycle PLA and PETG together?
No. Keep them separate. Different polymers have different processing behavior, and mixed feedstock can produce unpredictable extrusion, weak filament, and unreliable prints.
3. Do I really need to dry failed PLA prints first?
Drying is strongly recommended before extrusion. Moisture can contribute to bubbling, unstable flow, poor surface quality, and polymer degradation.
4. Can I use a household blender to shred failed prints?
It is a poor choice. Rigid prints can damage household equipment and create inconsistent chunks. A purpose-built plastic shredder or granulator is safer and produces more suitable feedstock.
Turning the Scrap Bin Into Raw Material
Learning how to recycle failed 3d prints into new filament at home changes the way you look at a failed print. It stops being automatically useless, but it does not instantly become perfect raw material either.
The successful approach is disciplined: identify the polymer, keep contamination out, shred consistently, remove moisture, control extrusion, measure diameter, and test every batch before trusting it.
For occasional printing, buying another spool will usually be easier. For a busy workshop producing buckets of predictable PLA waste, however, home recycling can become a genuinely useful closed-loop experiment—and every failed print becomes another chance to improve the process.