

A 3D-printed cup can look completely solid and still lose water through openings too small to see. The problem is rarely a dramatic crack. More often, liquid follows microscopic channels between extrusion lines, imperfect perimeter bonds, the bottom shell, or the Z-seam.
Learning how to 3d print water tight containers that do not leak therefore means treating the print as a continuous barrier rather than merely a strong object. Material matters, but extrusion consistency, wall construction, temperature, geometry, and testing usually determine whether a container survives overnight without leaving a damp ring underneath it.
Why Apparently Solid 3D Prints Can Leak
Fused filament fabrication builds an object by placing narrow strands of molten thermoplastic beside and on top of one another. NIST describes material extrusion as a layer-by-layer process and has specifically studied how polymer strands weld together during printing.
That welding step is crucial.
If adjacent lines do not fully merge, tiny voids remain. Several individually harmless voids can connect and form a capillary-sized path from the inside wall to the outside.
Understanding why 3D printing was invented provides useful context for how additive manufacturing evolved from rapid prototyping into a technology capable of producing functional components with increasingly demanding performance requirements.
NIST researchers studying interlayer weld formation found that temperature history and polymer mobility influence bonding between deposited layers. NIST study on weld formation in material extrusion that helps explain why printing slightly hotter or slowing a troublesome print can sometimes stop leaking without changing the model.
A University of Texas at Arlington dissertation on thin-wall FFF structures likewise notes that inherent voids and poor layer-to-layer adhesion remain important challenges in extrusion printing.
Choose Filament for the Container’s Real Job
PETG is my default recommendation for reusable water-holding prints. It normally provides strong layer bonding, good toughness, and useful chemical resistance without requiring the tightly controlled enclosure commonly associated with ABS or ASA.
PLA can also hold water successfully. The idea that every PLA container inevitably leaks is misleading. A well-calibrated PLA print with thick, properly fused walls may remain watertight for decorative planters, reservoirs, testing vessels, and other moderate-temperature applications.
Its limitations appear when heat, prolonged outdoor exposure, mechanical abuse, or repeated sanitation becomes important.
ABS and ASA can produce excellent durable containers, particularly where temperature and weather resistance matter. Their disadvantage is printing difficulty: warping and uneven shrinkage can create exactly the cracks a watertight design cannot tolerate.
| Material | Watertight-print potential | Best use | Main limitation |
| PETG | Excellent | Reservoirs, planters, utility containers | Stringing and moisture-sensitive printing |
| PLA | Good | Indoor, cool-water applications | Poorer heat resistance |
| ASA/ABS | Excellent when printed well | Outdoor or higher-temperature uses | Warping and fumes |
Whatever material you choose, use dry filament. Moist filament can cause inconsistent extrusion, bubbling, rough surfaces, and weakened bonding.
Beyond specialized containers, 3D printing also offers practical solutions for everyday needs, as demonstrated by these 11 truly useful things to 3D print for daily life, which showcase how thoughtfully designed printed objects can combine functionality with convenience.
The Slicer Settings That Matter Most
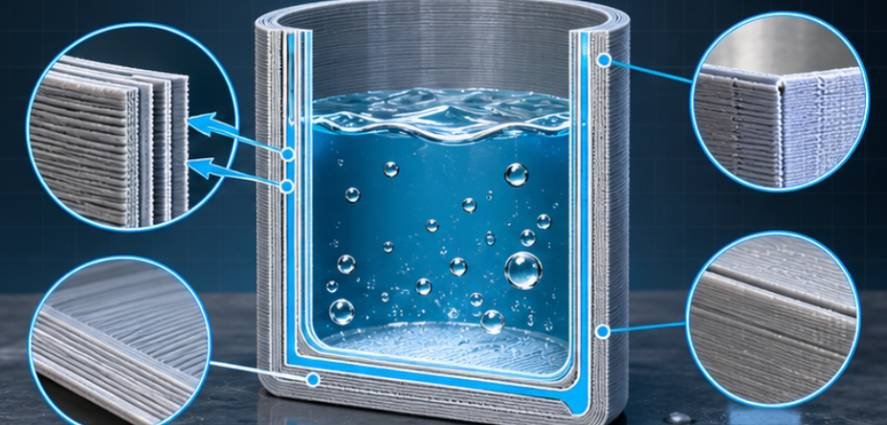
For how to 3d print water tight containers that do not leak, wall construction deserves more attention than extreme infill. Start with four or five perimeters. With a typical 0.4 mm nozzle, aim for roughly 1.6–2.0 mm of effective wall thickness rather than relying on one or two fragile shells.
Use at least five solid bottom layers. Large flat containers often fail where the sidewall meets the floor, so generous bottom thickness provides both sealing capacity and mechanical stiffness.
A layer height between roughly 0.12 and 0.20 mm is a sensible starting range for a 0.4 mm nozzle. Extremely tiny layers are not automatically better; reliable extrusion is more important than chasing resolution.
Encourage the Extrusion Lines to Fuse
If calibration is already accurate, printing about 5°C hotter than your normal cosmetic profile can improve bonding. Stay within the filament manufacturer’s recommended range rather than blindly raising temperature.
Flow is equally important. An under-extruding printer creates small spaces between neighboring lines. Calibrate extrusion first; if a test vessel still shows microscopic seepage, a modest flow increase around 102–105% can be tested.
Do not compensate for major calibration errors with excessive flow. Over-extrusion can cause dimensional problems, blobs, rough seams, and poor lid fit.
Slowing perimeter speed can also help because the material has more opportunity to contact and fuse with the preceding extrusion.
Do Not Let the Z-Seam Become a Drainage Channel
Every perimeter needs a point where extrusion starts or stops. Stack those points directly above each other and the model may develop one continuous weak line.
Inspect the seam location in your slicer’s preview before printing.
For a simple cylinder, moving the seam to a noncritical area or using an appropriate staggered strategy can reduce the chance that tiny imperfections form a straight leak path. More importantly, tune retraction and pressure behavior so the printer does not leave a gap at every perimeter restart.
Also avoid razor-thin walls, complicated internal corners, and unsupported transitions. Rounded inside corners and generous wall thickness are easier to seal reliably.
A Simple Leak Test Before You Trust the Part
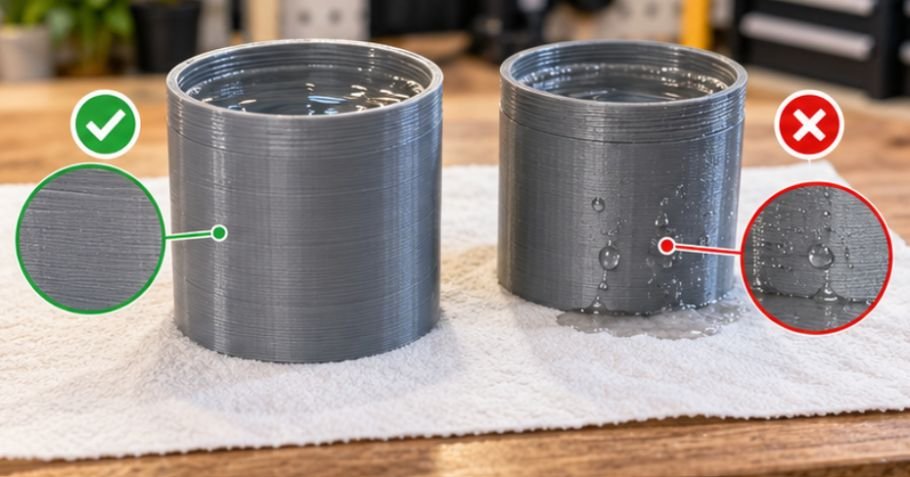
Do not judge watertightness immediately after removing the print. First inspect the bottom and seam under bright light. Fill the container completely with room-temperature water, dry its exterior, and place it on a dry paper towel. Check after 15 minutes, one hour, and again after 12–24 hours.
A visible stream usually signals a major defect or crack. A slowly darkening patch on the towel points toward microscopic porosity. Moisture appearing specifically along the seam suggests start-stop extrusion problems.
Testing overnight matters because capillary leakage can be extremely slow.
Containers intended to hold pressure need substantially more engineering. A print that holds standing water is not automatically pressure-tight and should not be treated as a safe pressure vessel.
When Post-Processing Makes More Sense Than Reprinting
If the print only exhibits slight seepage, a continuous coating can close pathways that slicer adjustments cannot eliminate.
If you need a more precise finishing solution for a specialized project, learning how to 3D print custom silicone molds for resin casting can also help you understand how printed components serve as functional mold patterns for creating customized parts.
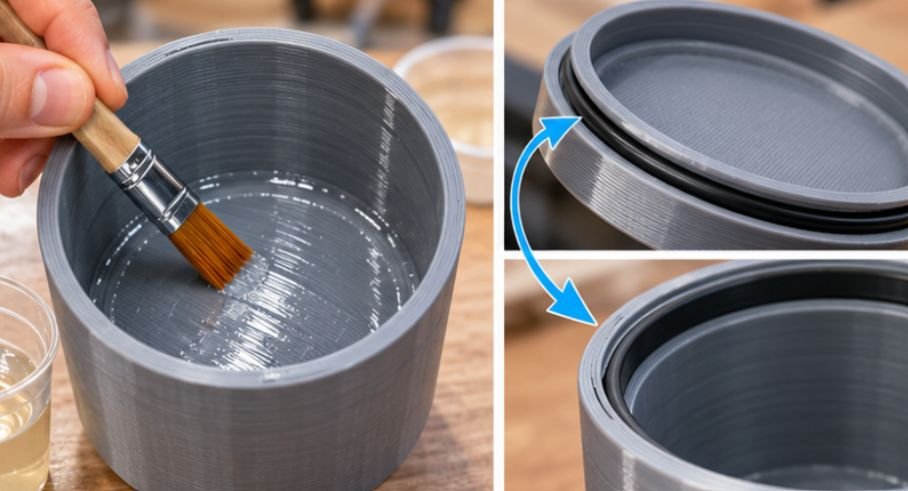
Brush-on epoxy is one practical option. Apply a thin, continuous film to the inside and allow it to cure fully according to the manufacturer’s instructions. Clear polyurethane coatings may work for some non-food applications as well.
For a removable lid, the printed walls may not be the problem at all. Design a groove for an appropriately sized elastomer O-ring and give the gasket a controlled amount of compression. Threaded plastic-on-plastic closures alone frequently seep.
If the vessel will touch drinking water or food, waterproof does not automatically mean food-safe. FDA guidance makes clear that food-contact safety depends on the substances involved and their intended conditions of use.
The FDA also evaluates the regulatory status of individual components that can reasonably migrate into food. Consequently, a spool labeled with a familiar polymer name should not by itself be treated as proof that the completed printed container is suitable for repeated food contact.
One More Concern: Print Safely While Chasing Better Fusion
Higher nozzle temperatures can improve bonding, but they should not be pursued without ventilation.
EPA and CDC/NIOSH research shows that desktop filament printers can emit ultrafine particles and volatile organic compounds, with emissions affected by material and operating conditions. NIOSH recommends appropriate ventilation and other exposure controls for 3D-printing environments. CDC/NIOSH guidance on additive manufacturing That is particularly relevant with ABS and specialty filaments.
Frequently Asked Questions
1. Is PETG completely waterproof after 3D printing?
No. PETG itself resists water well, but gaps between extrusion lines can still leak. Wall thickness, flow calibration, temperature, seams, and layer bonding determine the finished container’s watertightness.
2. Does 100% infill make a 3D print watertight?
Not necessarily. Water generally escapes through the outer shell or layer interfaces. Multiple well-bonded perimeters and solid bottom layers are usually more important than filling the entire interior.
3. Can PLA be used for a watertight container?
Yes. Properly printed PLA can hold room-temperature water. PETG is usually preferable for tougher, longer-term, outdoor, or moisture-heavy applications because it provides a more forgiving combination of durability and layer adhesion.
4. How thick should a watertight 3D-printed wall be?
A useful starting point is four to five perimeters, typically producing about 1.6–2.0 mm of wall thickness with common 0.4 mm-nozzle settings.
Build the Barrier, Not Just the Shape
The difference between a decorative vase and a dependable reservoir may be a gap thinner than a human hair. That is why how to 3d print water tight containers that do not leak is mostly a lesson in controlling extrusion interfaces.
Start with dry PETG or another appropriate material, use thick multi-perimeter walls, provide generous bottom shells, calibrate flow, promote strong thermal bonding, and examine the seam before printing. Then test the finished part for a full day rather than trusting appearances. If slow seepage remains, diagnose where it originates before reaching for sealant. A truly watertight print is not an accident; it is the result of eliminating every continuous path water can follow.







