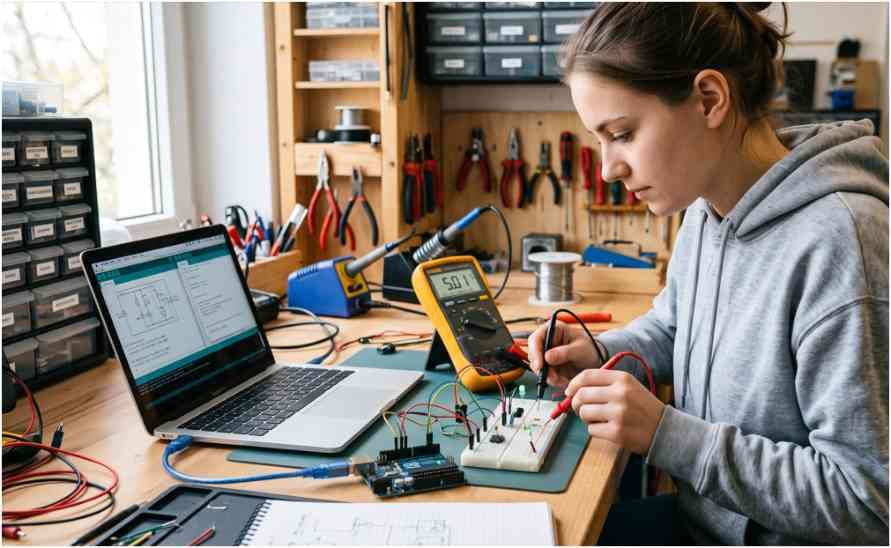
A cheap iron becomes expensive when it lifts a copper pad from your first circuit board. I’d build a smaller kit with controlled heat, reliable support, and tools for fixing mistakes.
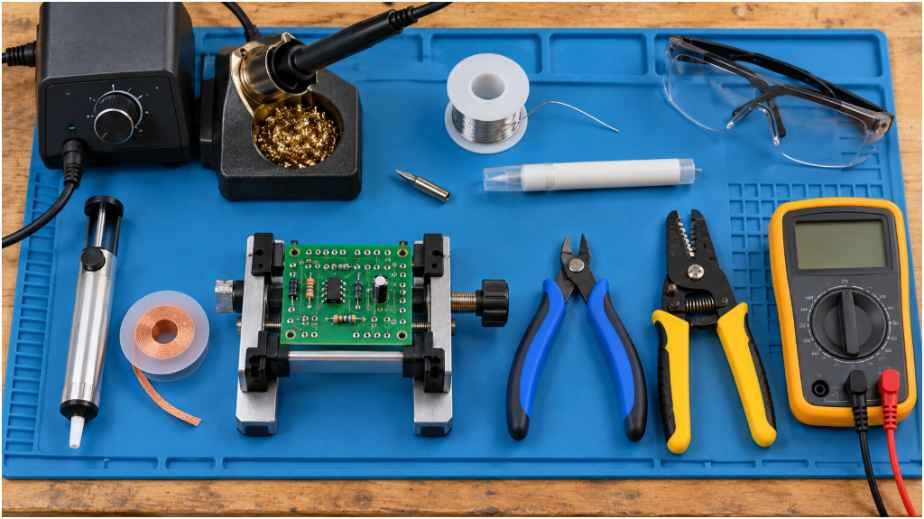
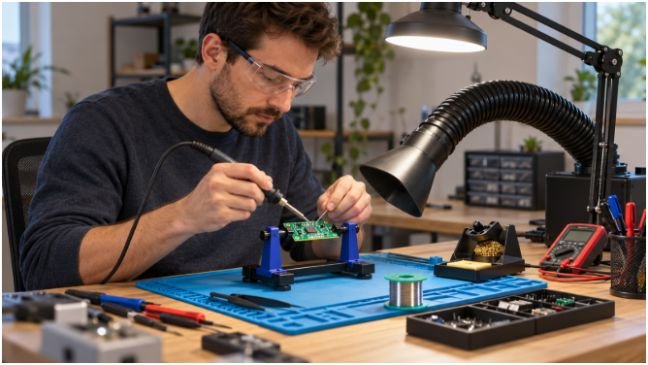
My essential soldering tools for beginner electronics makers start with a temperature-controlled iron, chisel tip, stable stand, and PCB holder. Add electronics solder, flux, brass wool, a pump, braid, cutters, and strippers. Fume extraction, eye protection, and a multimeter complete a practical learning bench.
Here’s how I’d choose each piece without buying accessories before knowing why I need them.
Start With a Temperature-Controlled Soldering Iron
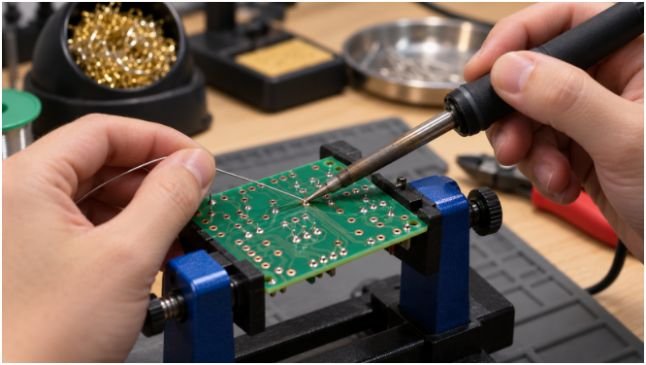
Choose an iron that regulates temperature, accepts replacement tips, and feels comfortable in your hand. A fixed-temperature wall pencil gives you less control as joints absorb heat.
For small boards, a regulated iron around 40–70W is a sensible shopping range. Wattage describes available heating power, not the temperature a component must endure. Good heat recovery helps you finish joints promptly.
A ceramic heater alone doesn’t guarantee good performance. Check tip availability, temperature control, cable flexibility, and replacement parts before comparing bundle sizes.
The Pinecil V2 illustrates the portable approach. PINE64’s documentation describes temperature control, sleep functions, and several power options. Budget for a compatible supply, cable, and stand; an ordinary phone charger may limit performance.
For a desktop station, verify US 120V compatibility. When comparing a portable soldering station for electronics workbench use, include those supporting accessories in the total cost.
Choose a Useful Tip and Temperature
I’d start with a small chisel tip whose face fits the pad. Its flat surface improves contact with both the pad and component lead.
A needle tip can help in tight spaces, but its tiny contact area makes ordinary joints harder to heat.
Don’t treat 300–350°C as a universal rule. HAKKO’s tip-care guidance suggests starting around 330–350°C when no other specification applies, then adjusting for the task.
Follow the solder manufacturer’s guidance, especially with lead-free alloys. Before raising temperature, check tip cleanliness, contact area, and power delivery.
Hold the Work and Protect Your Bench
A heavy stand is essential whenever the iron leaves your hand. Check that it holds your particular iron securely without heating nearby cables.
Use a heat-resistant work mat over a clear, stable surface. Keep the hot tool away from loose packaging, sleeves, and power cords.
A PCB vise usually supports boards more evenly than flexible helping hands. Alligator clips work well for wires, but bare jaws can damage insulation or scratch boards.
I’d choose the holder around my first projects. Small through-hole kits suit a compact vise; cable repairs benefit from adjustable clips.
Good lighting belongs here too. If a shadow hides the pad, reposition the lamp before adding heat.
Choose Electronics Solder, Flux, and Tip Cleaner
Pick Solder Wire You Can Control
Rosin-core electronics solder around 0.6–0.8mm is practical for beginner through-hole work. Thinner wire helps control the amount fed into smaller joints.
Leaded 60/40 or 63/37 solder melts at lower temperatures than common lead-free alternatives. Lead-free solder remains a workable choice when used with suitable flux and temperature settings.
I wouldn’t make leaded solder the automatic choice for every home. If you use it, wash your hands afterward, keep food away, and collect scraps carefully.
Adafruit’s soldering guide explains basic equipment and the different demands of lead-free solder. Buy a labeled spool from a traceable supplier rather than mystery wire bundled with an iron.
Add Compatible Flux and Brass Wool
Extra electronics flux helps solder wet clean metal, especially during rework. Choose a pen for controlled application or gel for work where flux needs to stay put.
Never substitute plumbing acid flux. Follow the electronics flux maker’s cleaning instructions; residue requirements vary by formulation.
Brass wool makes quick tip cleaning convenient. Use a cleaner intended for soldering tips rather than household steel wool.
A manufacturer-approved damp sponge is also valid. It isn’t automatically harmful when used correctly.
Keep the working tip tinned with solder between joints and before shutdown. Avoid filing plated tips; damaged plating shortens their useful life.
Keep Desoldering and Wire Preparation Tools Close
A manual desoldering pump removes larger amounts of molten solder from through-hole joints. Position it carefully and avoid striking the board during release.
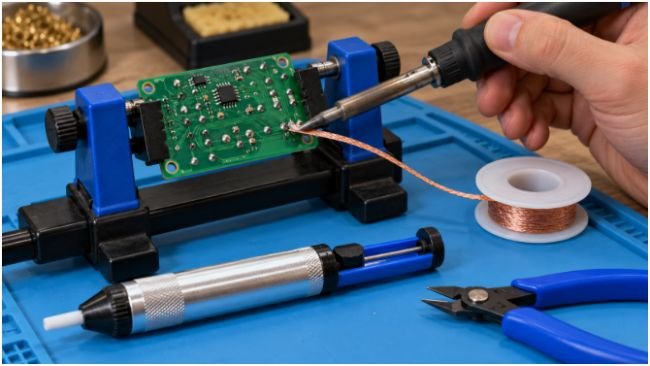
Copper braid handles thin solder layers and bridges. Add suitable flux, place the braid over the unwanted solder, and heat through it.
Lift the iron and braid together while the solder remains molten. Pulling stuck braid can damage pads. Let the board cool between repeated attempts.
Flush cutters trim component leads after soldering. Hold the offcut so it cannot fly toward your face.
Use wire strippers sized for your wire gauge. Nicked strands weaken a connection even when the solder joint looks tidy.
For enclosure work, a precision screwdriver set for small robotics repair helps remove fasteners without using cutters as improvised pliers.
Make Fume Control and Inspection Essential
Use source extraction positioned to capture the plume near the joint. A desk fan that spreads fumes across the room doesn’t provide equivalent control.
The Health and Safety Executive’s soldering guidance identifies rosin flux fumes as a respiratory hazard and recommends extraction. This applies to flux fumes from both leaded and lead-free soldering.
Wear safety glasses for soldering and lead clipping. Disconnect batteries and power supplies before working, and begin with low-voltage practice circuits.
Add a basic digital multimeter with continuity mode. It helps check connections and detect unwanted bridges before power reaches the board.
Use continuity mode only on unpowered circuits. Follow the kit’s expected connections because some legitimate circuit paths also produce a beep.
A First-Project Example That Tests Your Setup
Suppose your first project is a through-hole LED practice board. I’d use its assembly instructions to check polarity, then hold the board in a vise.
Touch the tinned chisel tip to both the pad and lead. Feed solder into the heated joint, stop feeding, remove the iron, and let everything cool without movement.
If solder beads up, check cleanliness and contact before increasing heat. If adjacent pads bridge, use flux and braid rather than repeatedly adding solder.
After clipping leads, inspect for bridges and check the intended connections with the meter before powering up.
This exercise reveals which tool solves which failure. A hotter iron cannot correct a moving board, and a shiny joint cannot prove correct wiring.
Less Gadget Hoarding, More Good Joints
I’d buy one capable iron and a complete support kit before collecting specialty tools. Hot-air stations, microscopes, and powered desoldering guns can wait for projects that require them.
Start with an inexpensive practice board. Make several joints, inspect them, then practice removing solder deliberately. Learning to reverse a mistake makes the next project less intimidating.
Frequently Asked Questions
1. What essential soldering tools for beginner electronics makers should I buy first?
Start with a regulated iron, stand, holder, solder, flux, cleaner, extraction, eye protection, cutters, strippers, desoldering tools, and multimeter.
2. Is a 60W soldering iron enough for beginner electronics?
A temperature-controlled 60W iron generally suits small through-hole boards, though large connectors and copper planes need more heat delivery.
3. Can beginners learn electronics soldering with lead-free solder?
Yes; use compatible electronics flux, suitable temperatures, and a tip that transfers heat effectively.
4. Do I need both solder wick and a desoldering pump?
They complement each other: a pump removes larger solder volumes, while braid cleans thin layers and small bridges.