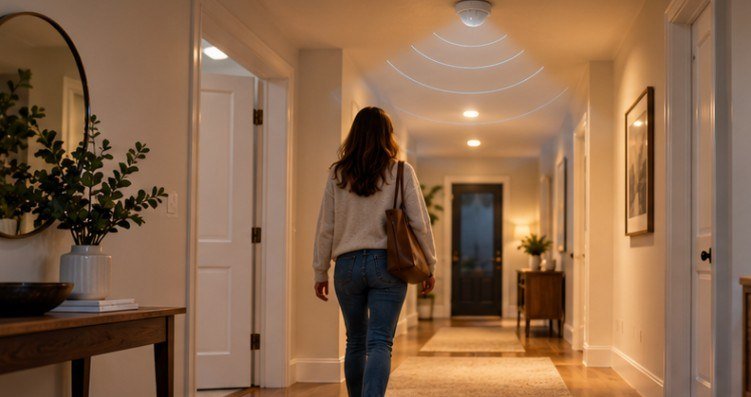
A motion sensor that saves a few watts but switches off the bathroom light while you are still inside is not smart automation. The real goal is to make lighting respond so naturally that you stop noticing the technology.
Learning how to automate home lighting with motion sensors therefore involves more than connecting a detector to a smart bulb. A reliable system combines the right sensor, appropriate lighting control, daylight awareness, sensible timers, and rules that account for how people actually use each room.
The payoff can include lower electricity use, better nighttime visibility, fewer lights left running, and a home that reacts without constant voice commands or phone taps.
Start With the Three Parts of a Reliable Lighting Automation
Almost every useful motion-controlled lighting setup has three layers: detection, control, and automation logic. The detector decides whether somebody is present. The lighting device performs the action. A smart-home platform decides exactly when and how that action should occur.
For detection, passive infrared sensors, better known as PIR sensors, remain one of the simplest choices. They detect changes in infrared energy caused by people moving through their field of view.
The U.S. Department of Energy notes that PIR technology works particularly well in smaller enclosed areas where occupants make obvious movements, although it is less effective at detecting small movements such as someone sitting at a desk.
That distinction explains why PIR is excellent for hallways, closets, laundry rooms, and many bathrooms but can become frustrating in offices or living rooms.
Consider Presence Sensors for Rooms Where People Sit Still
Millimeter-wave, or mmWave, sensors use radar rather than simply watching for large heat movements. They can recognize much smaller changes associated with an occupied room.
Research published through IEEE shows that modern mmWave radar can distinguish human presence even in environments containing stationary and moving objects, although placement, obstructions, reflections, and room geometry can still affect performance.
That makes presence sensing particularly useful beside a desk, sofa, reading chair, kitchen island, or other area where a person may remain almost motionless for long periods.
Choose What the Sensor Will Actually Control
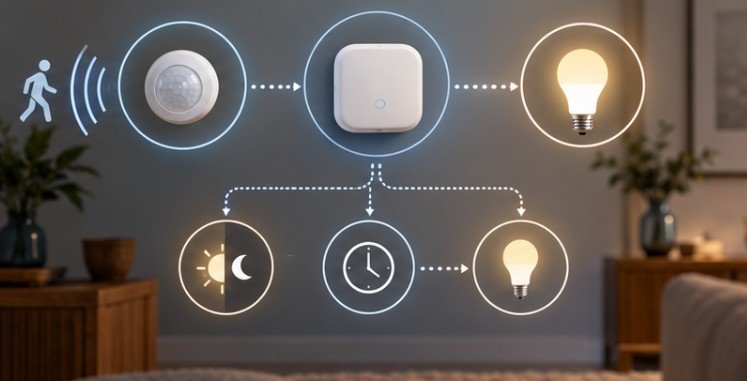
You generally have three practical options: smart bulbs, smart switches, or smart relays. Smart bulbs make sense when you want individual lamp control, color changes, tunable white light, or different brightness levels across multiple fixtures. However, somebody turning off the ordinary wall switch may cut power to the bulb and temporarily defeat the automation.
Smart switches usually work better for permanent ceiling fixtures. The household can continue using a familiar wall control while the automation handles the same circuit digitally.
Relays installed behind switches or inside approved electrical boxes can provide similar functionality while preserving existing switches. Because these devices may involve line-voltage wiring, installation needs to comply with applicable electrical requirements.
NFPA publishes the National Electrical Code, which provides the U.S. benchmark for safer electrical design and installation. Homeowners unfamiliar with line-voltage electrical work should use a qualified electrician rather than treating a smart-switch installation like a low-voltage electronics project.
Build the Automation Around Conditions, Not Just Motion
The basic rule is easy:
Motion detected → light on.
A better rule is:
Motion detected + room dark enough + correct time period + automation enabled → light on at the appropriate brightness. That small change makes a dramatic difference.
ENERGY STAR specifically recommends using smart lighting features such as occupancy detection and connected controls so lights operate when people actually need them rather than remaining on unnecessarily.
If your motion sensor measures illuminance, add a lux threshold. For example, you might prevent a hallway light from switching on whenever natural daylight already provides adequate visibility.
Do not obsess over finding one perfect lux number. Sensor placement affects readings considerably. Start with a threshold, observe the system for several days, and adjust it based on real conditions.
Use Different Lighting Rules After Dark
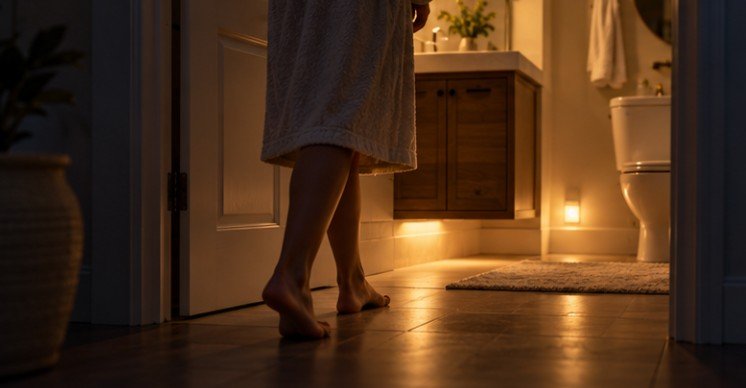
One of the biggest mistakes in how to automate home lighting with motion sensors is giving the sensor only two choices: completely off or maximum brightness. At 2 p.m., 100 percent brightness may be appropriate. At 2 a.m., it can feel painfully bright.
Create separate nighttime behavior instead. A hallway might use 70 to 100 percent brightness during evening hours but only 10 to 20 percent after midnight. Warm-white or amber lighting can make nighttime movement less disruptive than bright, cool-white light.
The concept is essentially layered automation: occupancy determines whether illumination is necessary, while time and ambient light determine what that illumination should look like.
Match the Timeout to the Room
The Illuminating Engineering Society defines an occupancy sensor as a control device that detects presence and switches lighting or other equipment off after a preset period without detected occupancy.
The key phrase is “preset period.” There should not be one universal timeout for the entire house. A pantry or walk-in closet might need only two or three minutes. Hallways can often use similarly short delays.
Bathrooms usually deserve more tolerance because someone can remain relatively still. Depending on the sensor, five to ten minutes may work better.
Living rooms, offices, workshops, and reading spaces require either much longer delays or true presence detection. Using a two-minute PIR timeout beside someone quietly reading is practically guaranteed to create frustration. Whenever new motion or presence is detected, restart the countdown rather than allowing the original timer to continue running.
A Simple Setup Process That Works
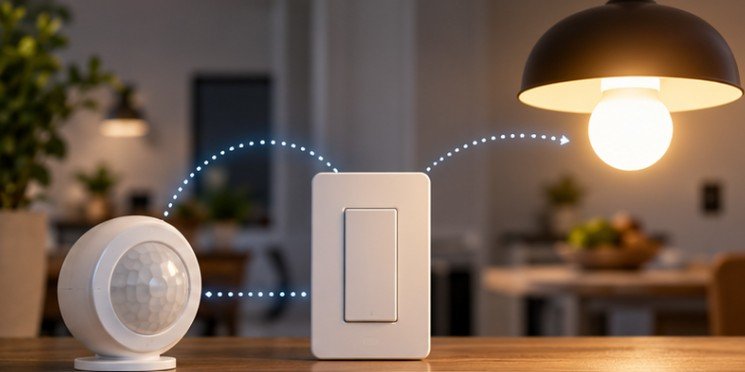
Rather than automating every room immediately, start with one high-value area such as a hallway, laundry room, closet, or bathroom.
First, position the sensor where people entering the space cross its detection zone. Avoid hiding it behind doors, furniture, shelving, or decorative objects. DOE and ENERGY STAR guidance both emphasize that placement affects occupancy-control performance. ENERGY STAR reports that occupancy controls in appropriate commercial applications can reduce lighting costs by roughly 15 to 30 percent, although actual residential savings depend heavily on household behavior and should not be assumed to match commercial results.
Second, create an automation that turns the light on only when occupancy is detected and illumination is below your chosen threshold.
Third, create the vacancy behavior. Start with a conservative timeout and shorten it only after the system works reliably.
Fourth, add separate evening and overnight brightness levels.
Finally, live with the automation for several days. Watch for false triggers, missed detection, unexpected shutoffs, and places where normal switch use conflicts with the automated rules.
That testing period is more valuable than adding another dozen complicated conditions.
Give People an Escape Route
Good automation should never trap users inside its logic. Keep manual switches functional whenever possible. If someone intentionally turns on a light, you may want the system to suspend automatic shutoff temporarily.
You can also create modes such as Guest, Movie, Cleaning, Away, or Bedtime. A Bedtime mode might disable the main hallway fixture while allowing a dim pathway light to respond to motion.
Vacancy-style automation is another useful option. Instead of automatically switching lights on, the user turns them on manually and the system only handles switching them off after the room becomes empty.
DOE notes that this strategy can save additional energy in spaces where daylight is often adequate because the system does not automatically illuminate the room simply because someone entered.
Frequently Asked Questions
1. What is the best sensor for automatic home lighting?
PIR is usually sufficient for hallways, closets, stairs, and utility areas. mmWave presence sensors are generally better where people sit still for long periods.
2. How long should motion-activated lights stay on?
Around two to five minutes can work for transitional areas. Bathrooms and occupied living spaces usually need longer delays or presence sensing to avoid premature shutoffs.
3. Can motion sensors work with regular LED bulbs?
Yes. A compatible smart switch or relay can automate conventional LED fixtures without requiring every bulb to be individually smart.
4. Does learning how to automate home lighting with motion sensors reduce electricity use?
It can, particularly where lights are frequently left on in empty rooms. Savings depend on room usage, existing lighting efficiency, automation settings, and household habits.
Make the House React to People, Not Technology
The best automated lighting system is surprisingly quiet. You enter a dark hallway and the right amount of light appears. You sit at a desk and it stays on. You walk away and eventually it disappears without demanding attention.
I would start with one frequently used transitional room, combine occupancy with a daylight condition, and tune the timeout before expanding anywhere else. Once that room becomes boringly reliable, copy the principle rather than the exact settings. Every space has different movement patterns, daylight, and expectations. Smart lighting succeeds when the automation adapts to those differences instead of forcing the household to adapt to the automation.